Installing HyperPath on Debian Linux
Introduction
HyperPath provides powerful network connectivity features on Debian-based Linux distributions. This guide walks you through the installation process on Debian systems, where HyperPath runs as a SystemD service configured to automatically start on boot.
Supported Distributions
HyperPath supports most Debian-based Linux distributions, including:
- Ubuntu: Recommended version is 22.04 LTS, but other versions are compatible
- Debian: Debian 10 (Buster) and Debian 11 (Bullseye)
- Linux Mint
- Pop!_OS
- Elementary OS
Prerequisites
Before beginning the installation, ensure you have:
- Root or sudo access on the target Debian system
- An active HyperPath account
- A created HyperNet in your account
- A token configured for your device
- A stable internet connection
If you haven't set up an account, HyperNet, or token yet, please follow the Quick Start Guide first.
Installation Process
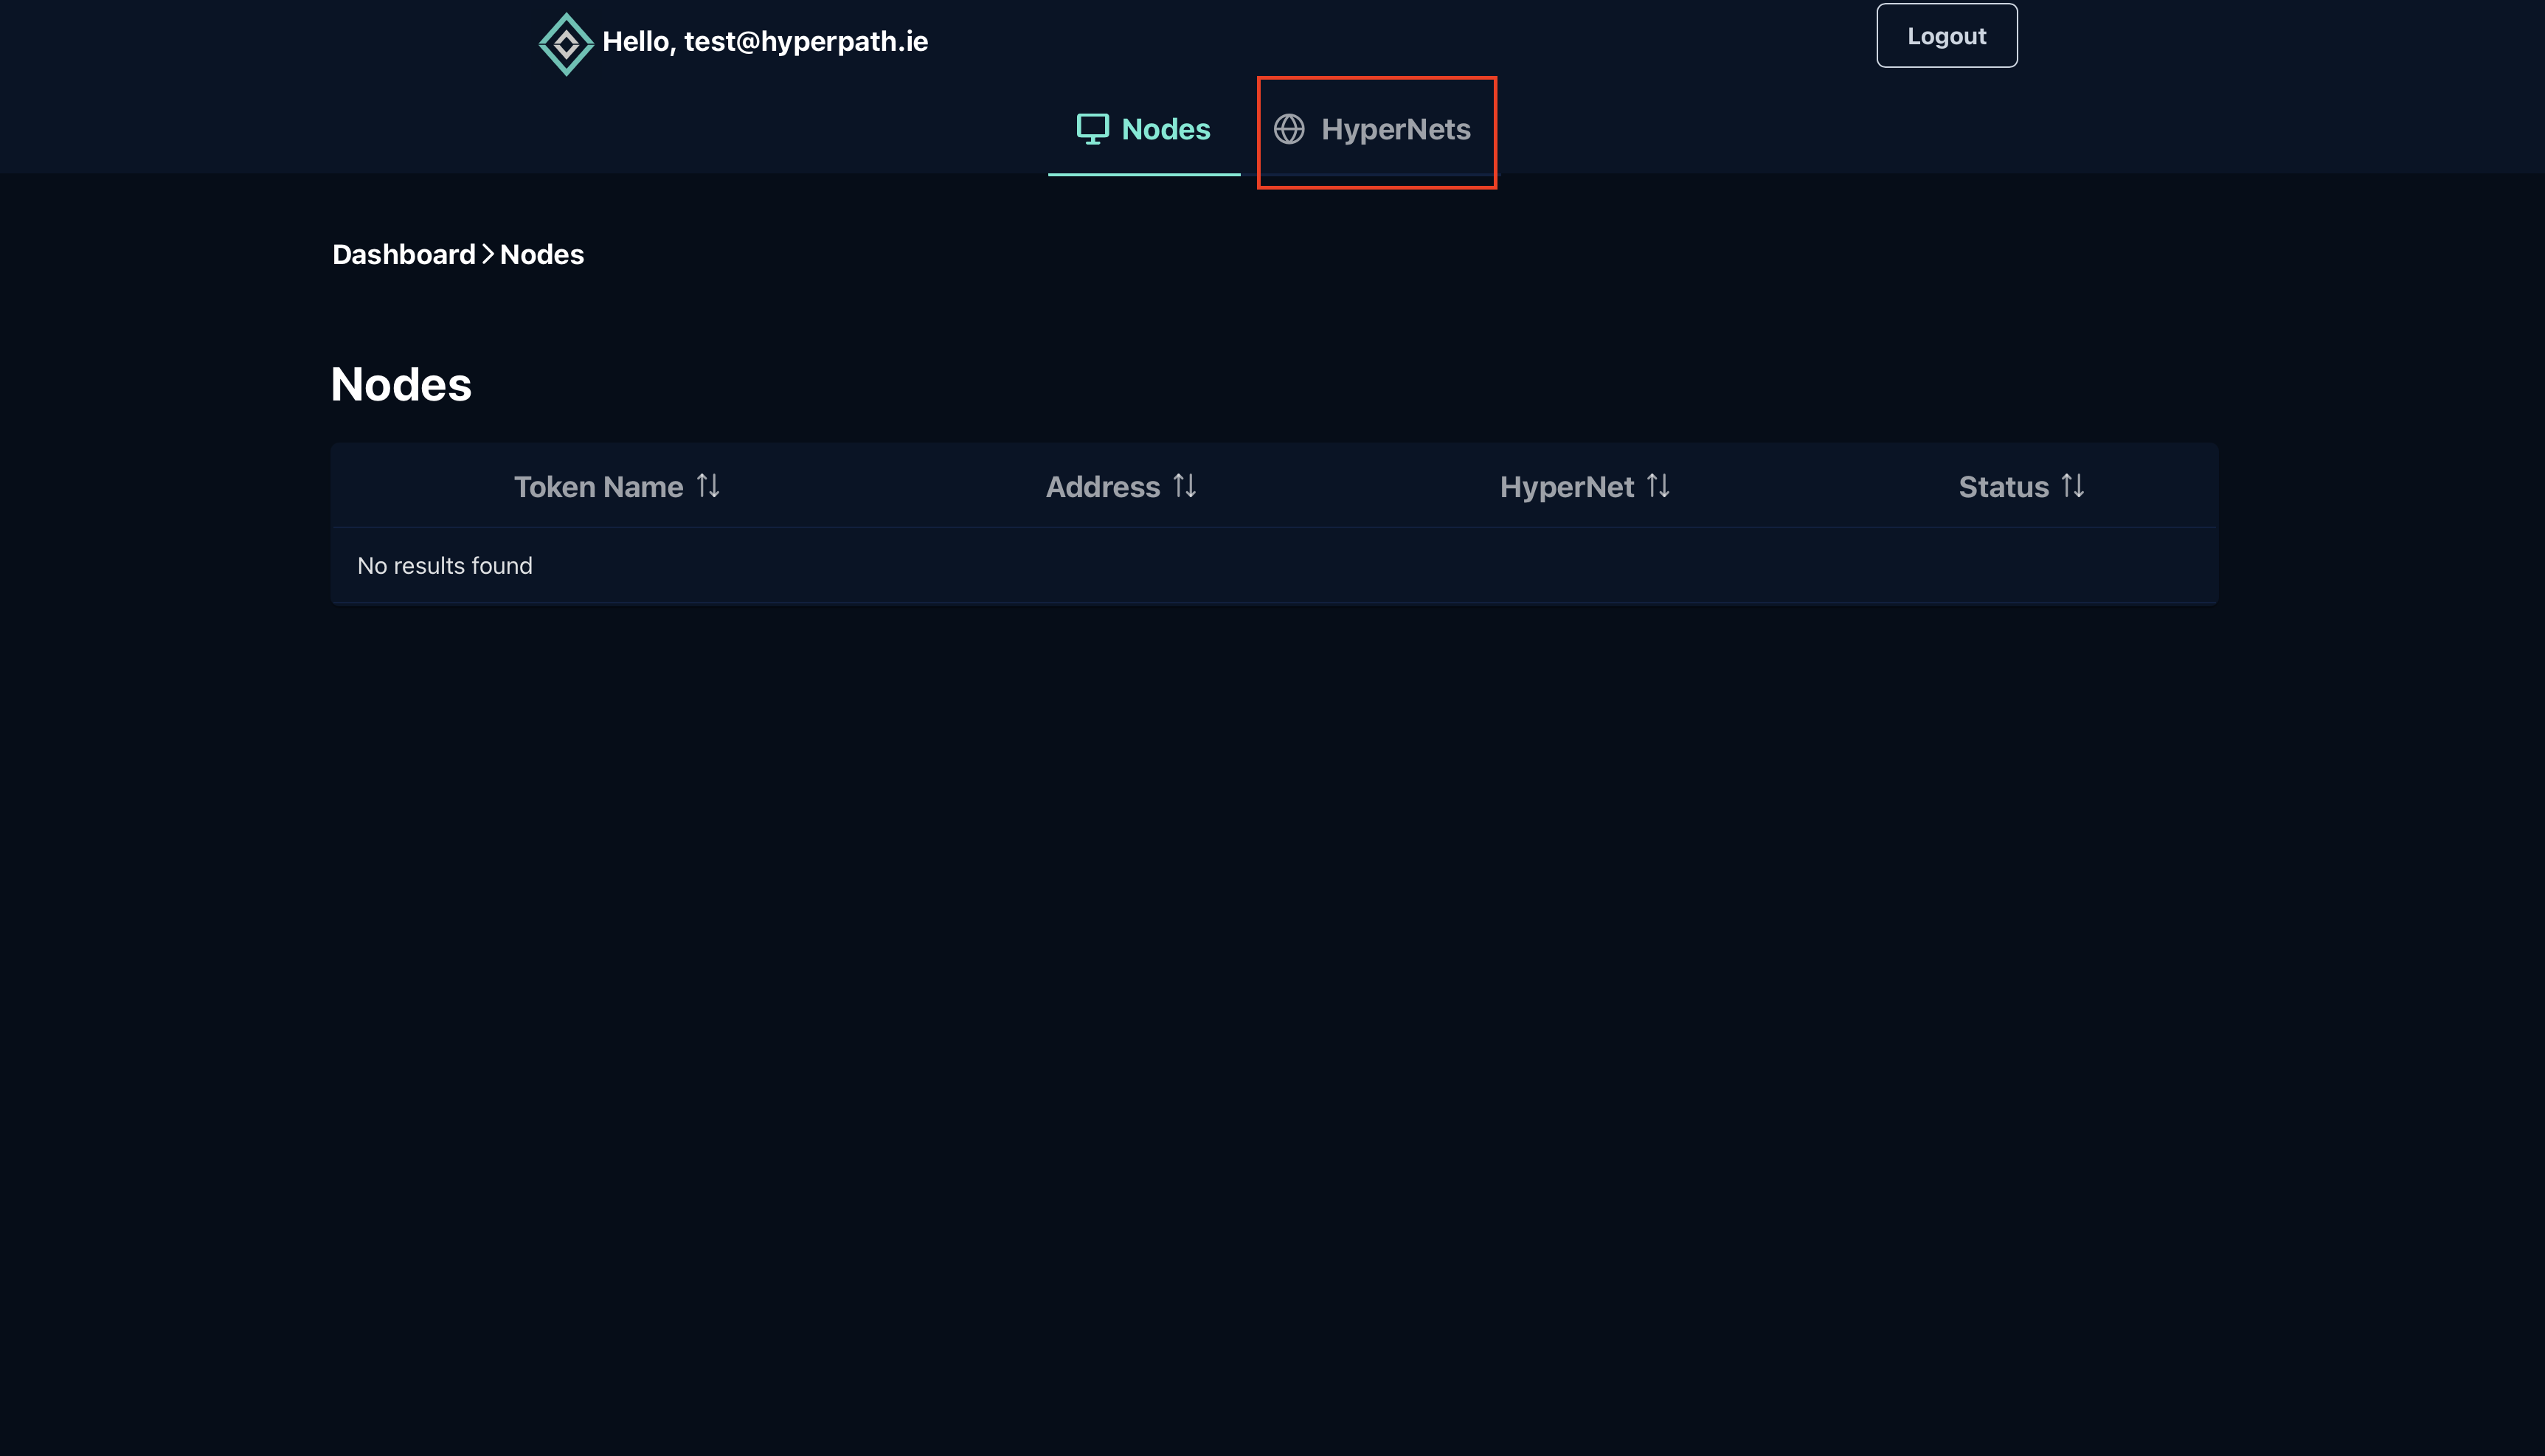
Step 1: Access the HyperPath Admin Console
- Open your web browser and navigate to the HyperPath admin console
- Log in with your credentials
- Click on the HyperNets tab in the top navigation menu
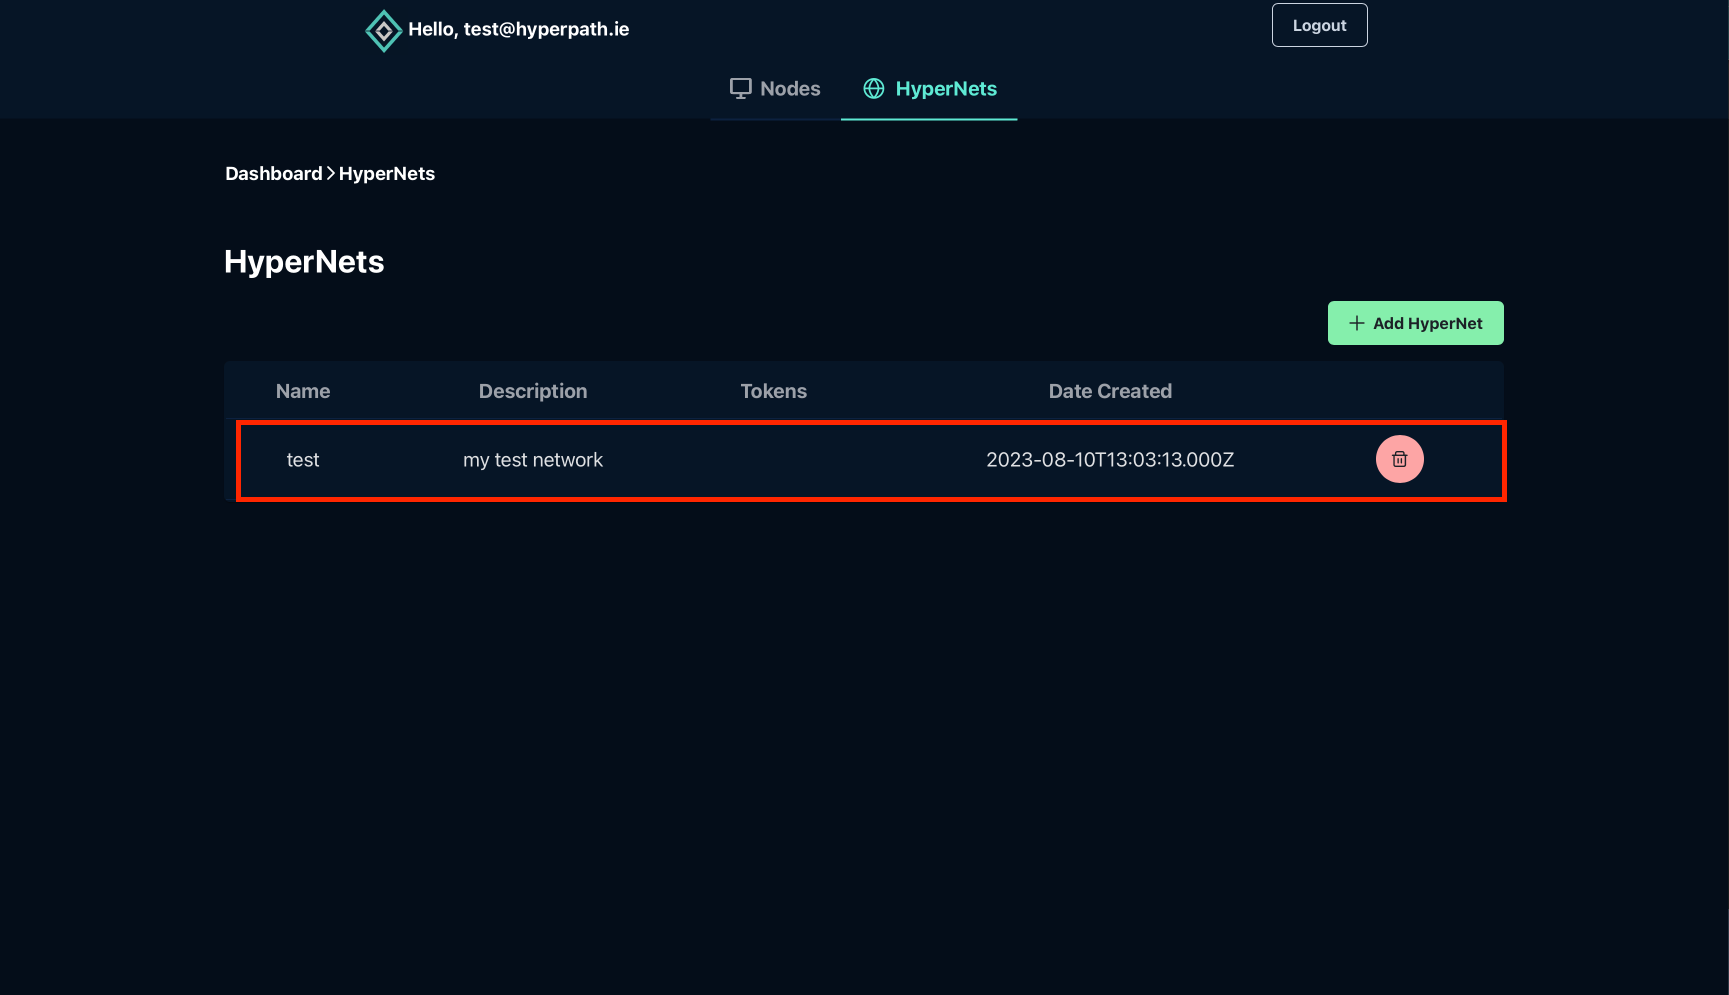
Step 2: Select Your HyperNet
Navigate to the specific HyperNet where you want to add this device:
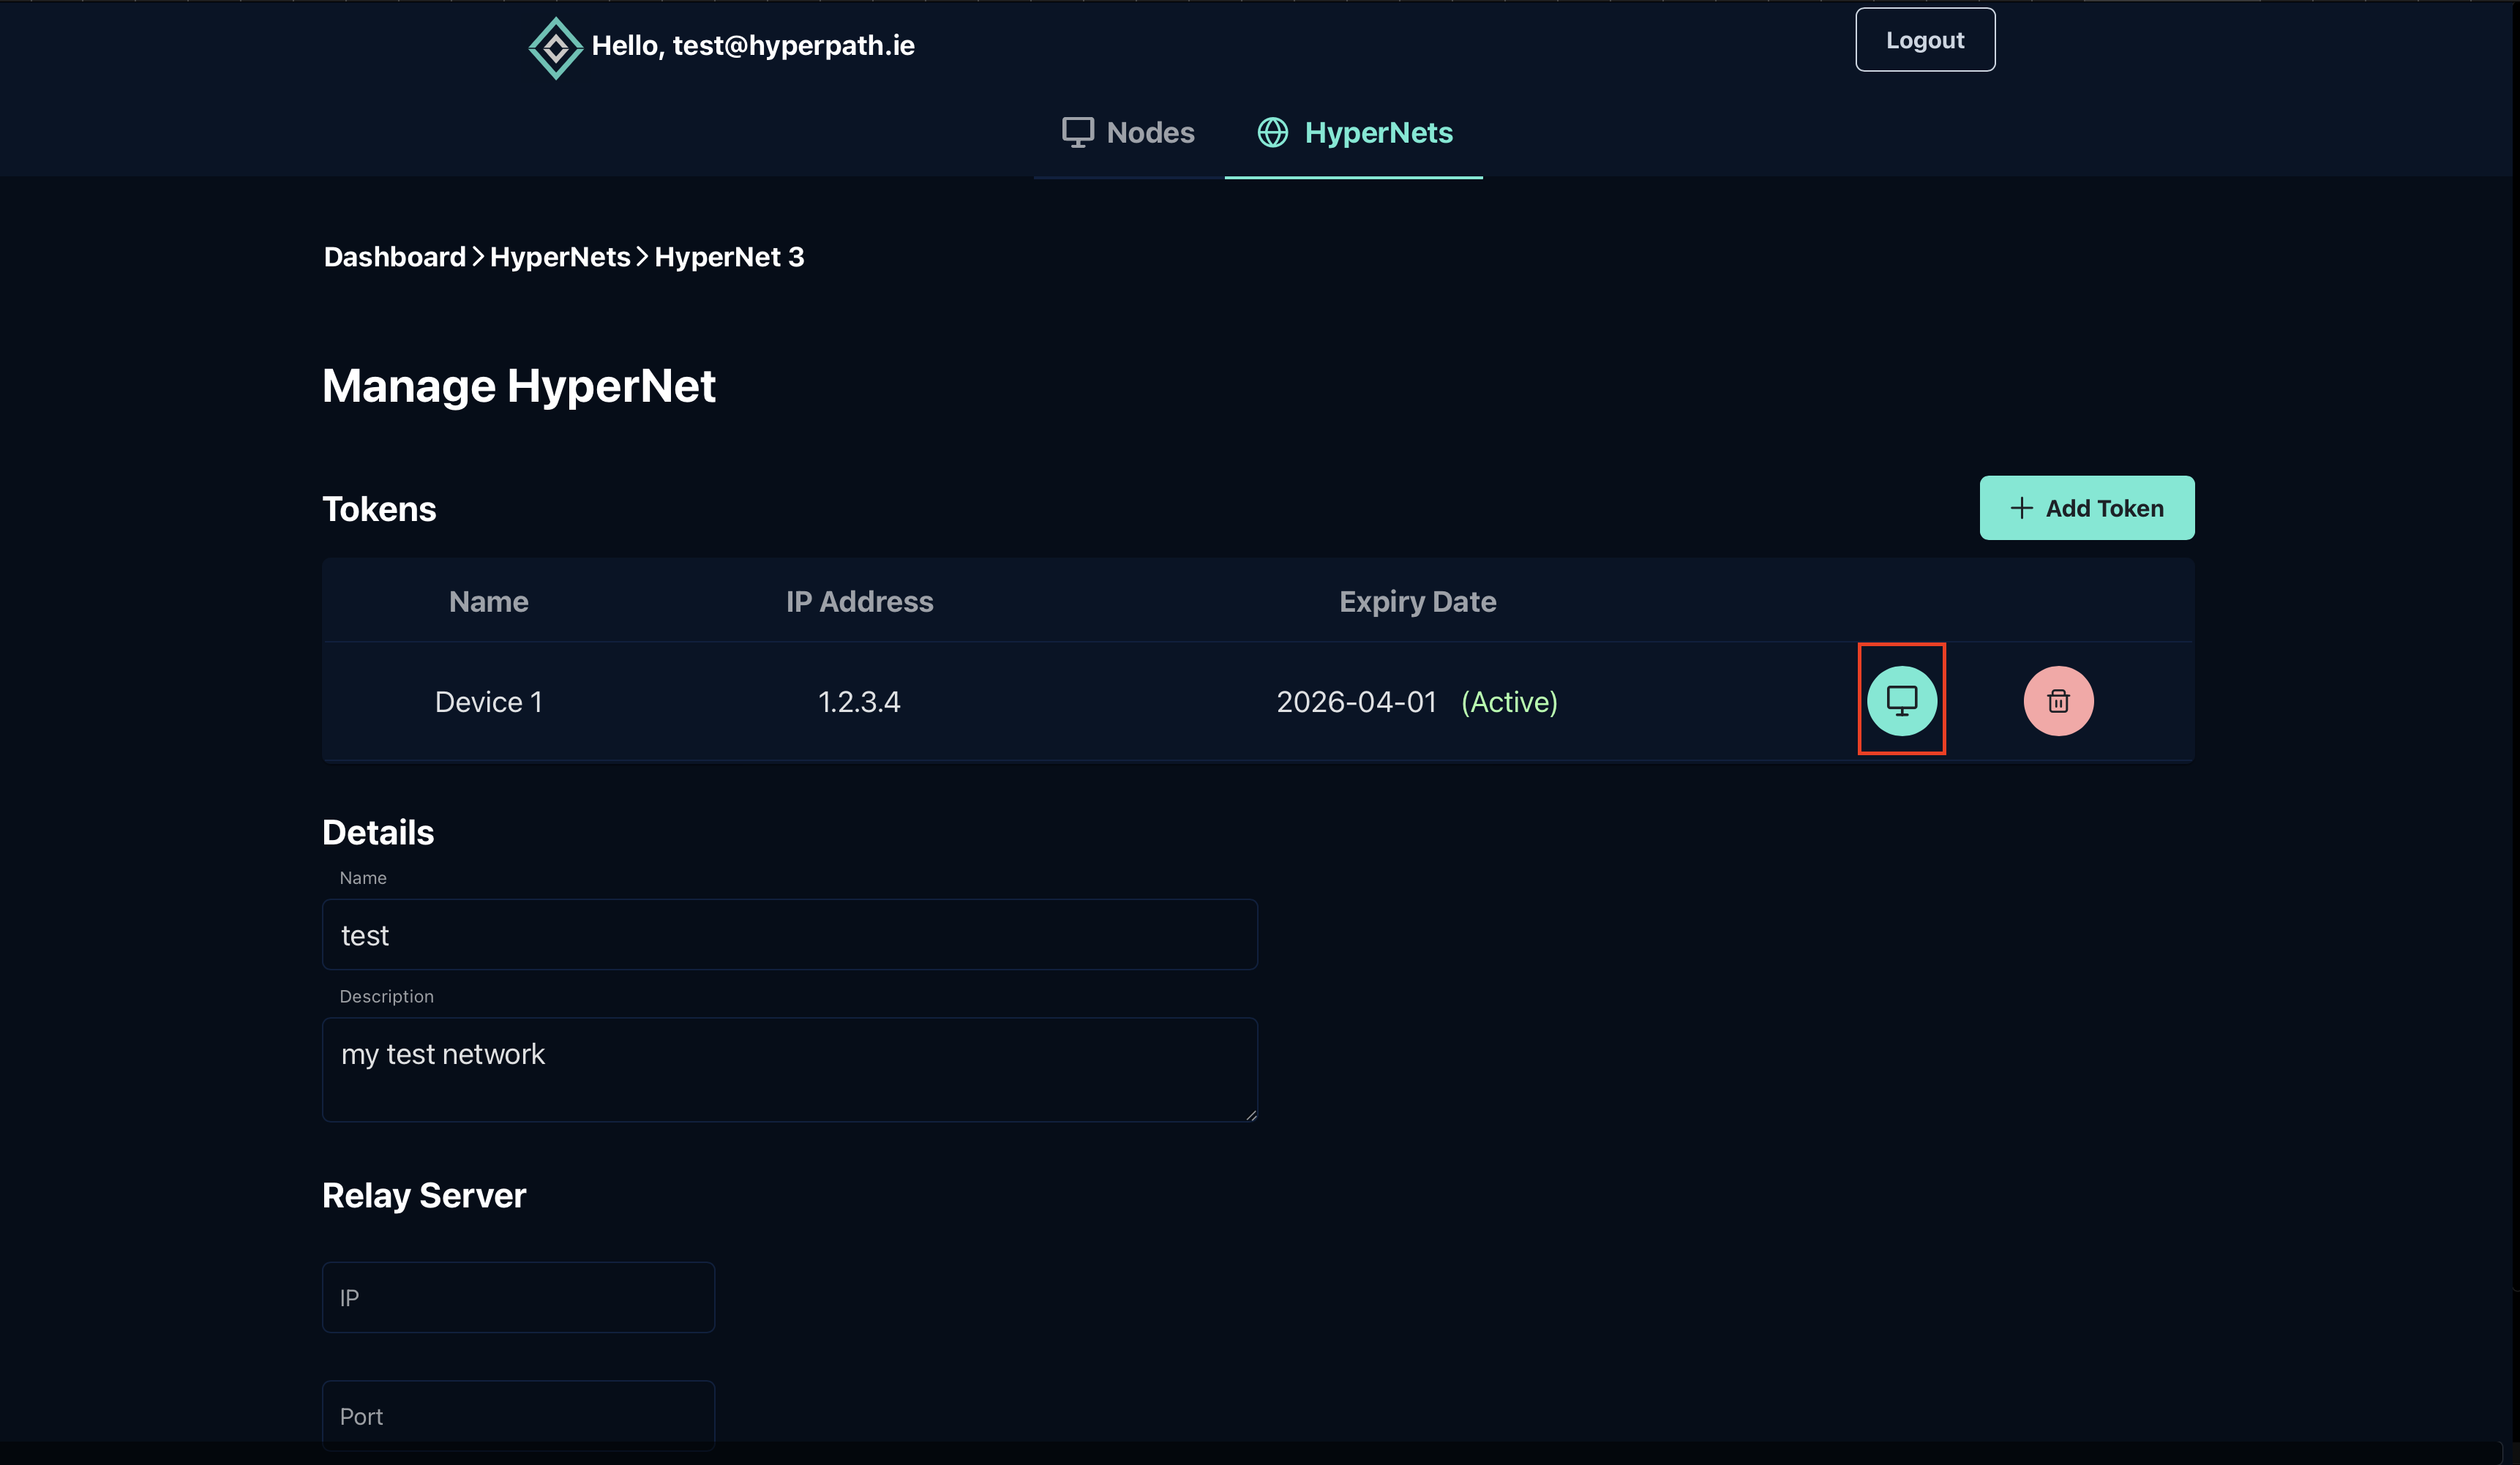
Step 3: Access Token Installation Command
Find and click on the computer icon associated with the token you've created for this device:
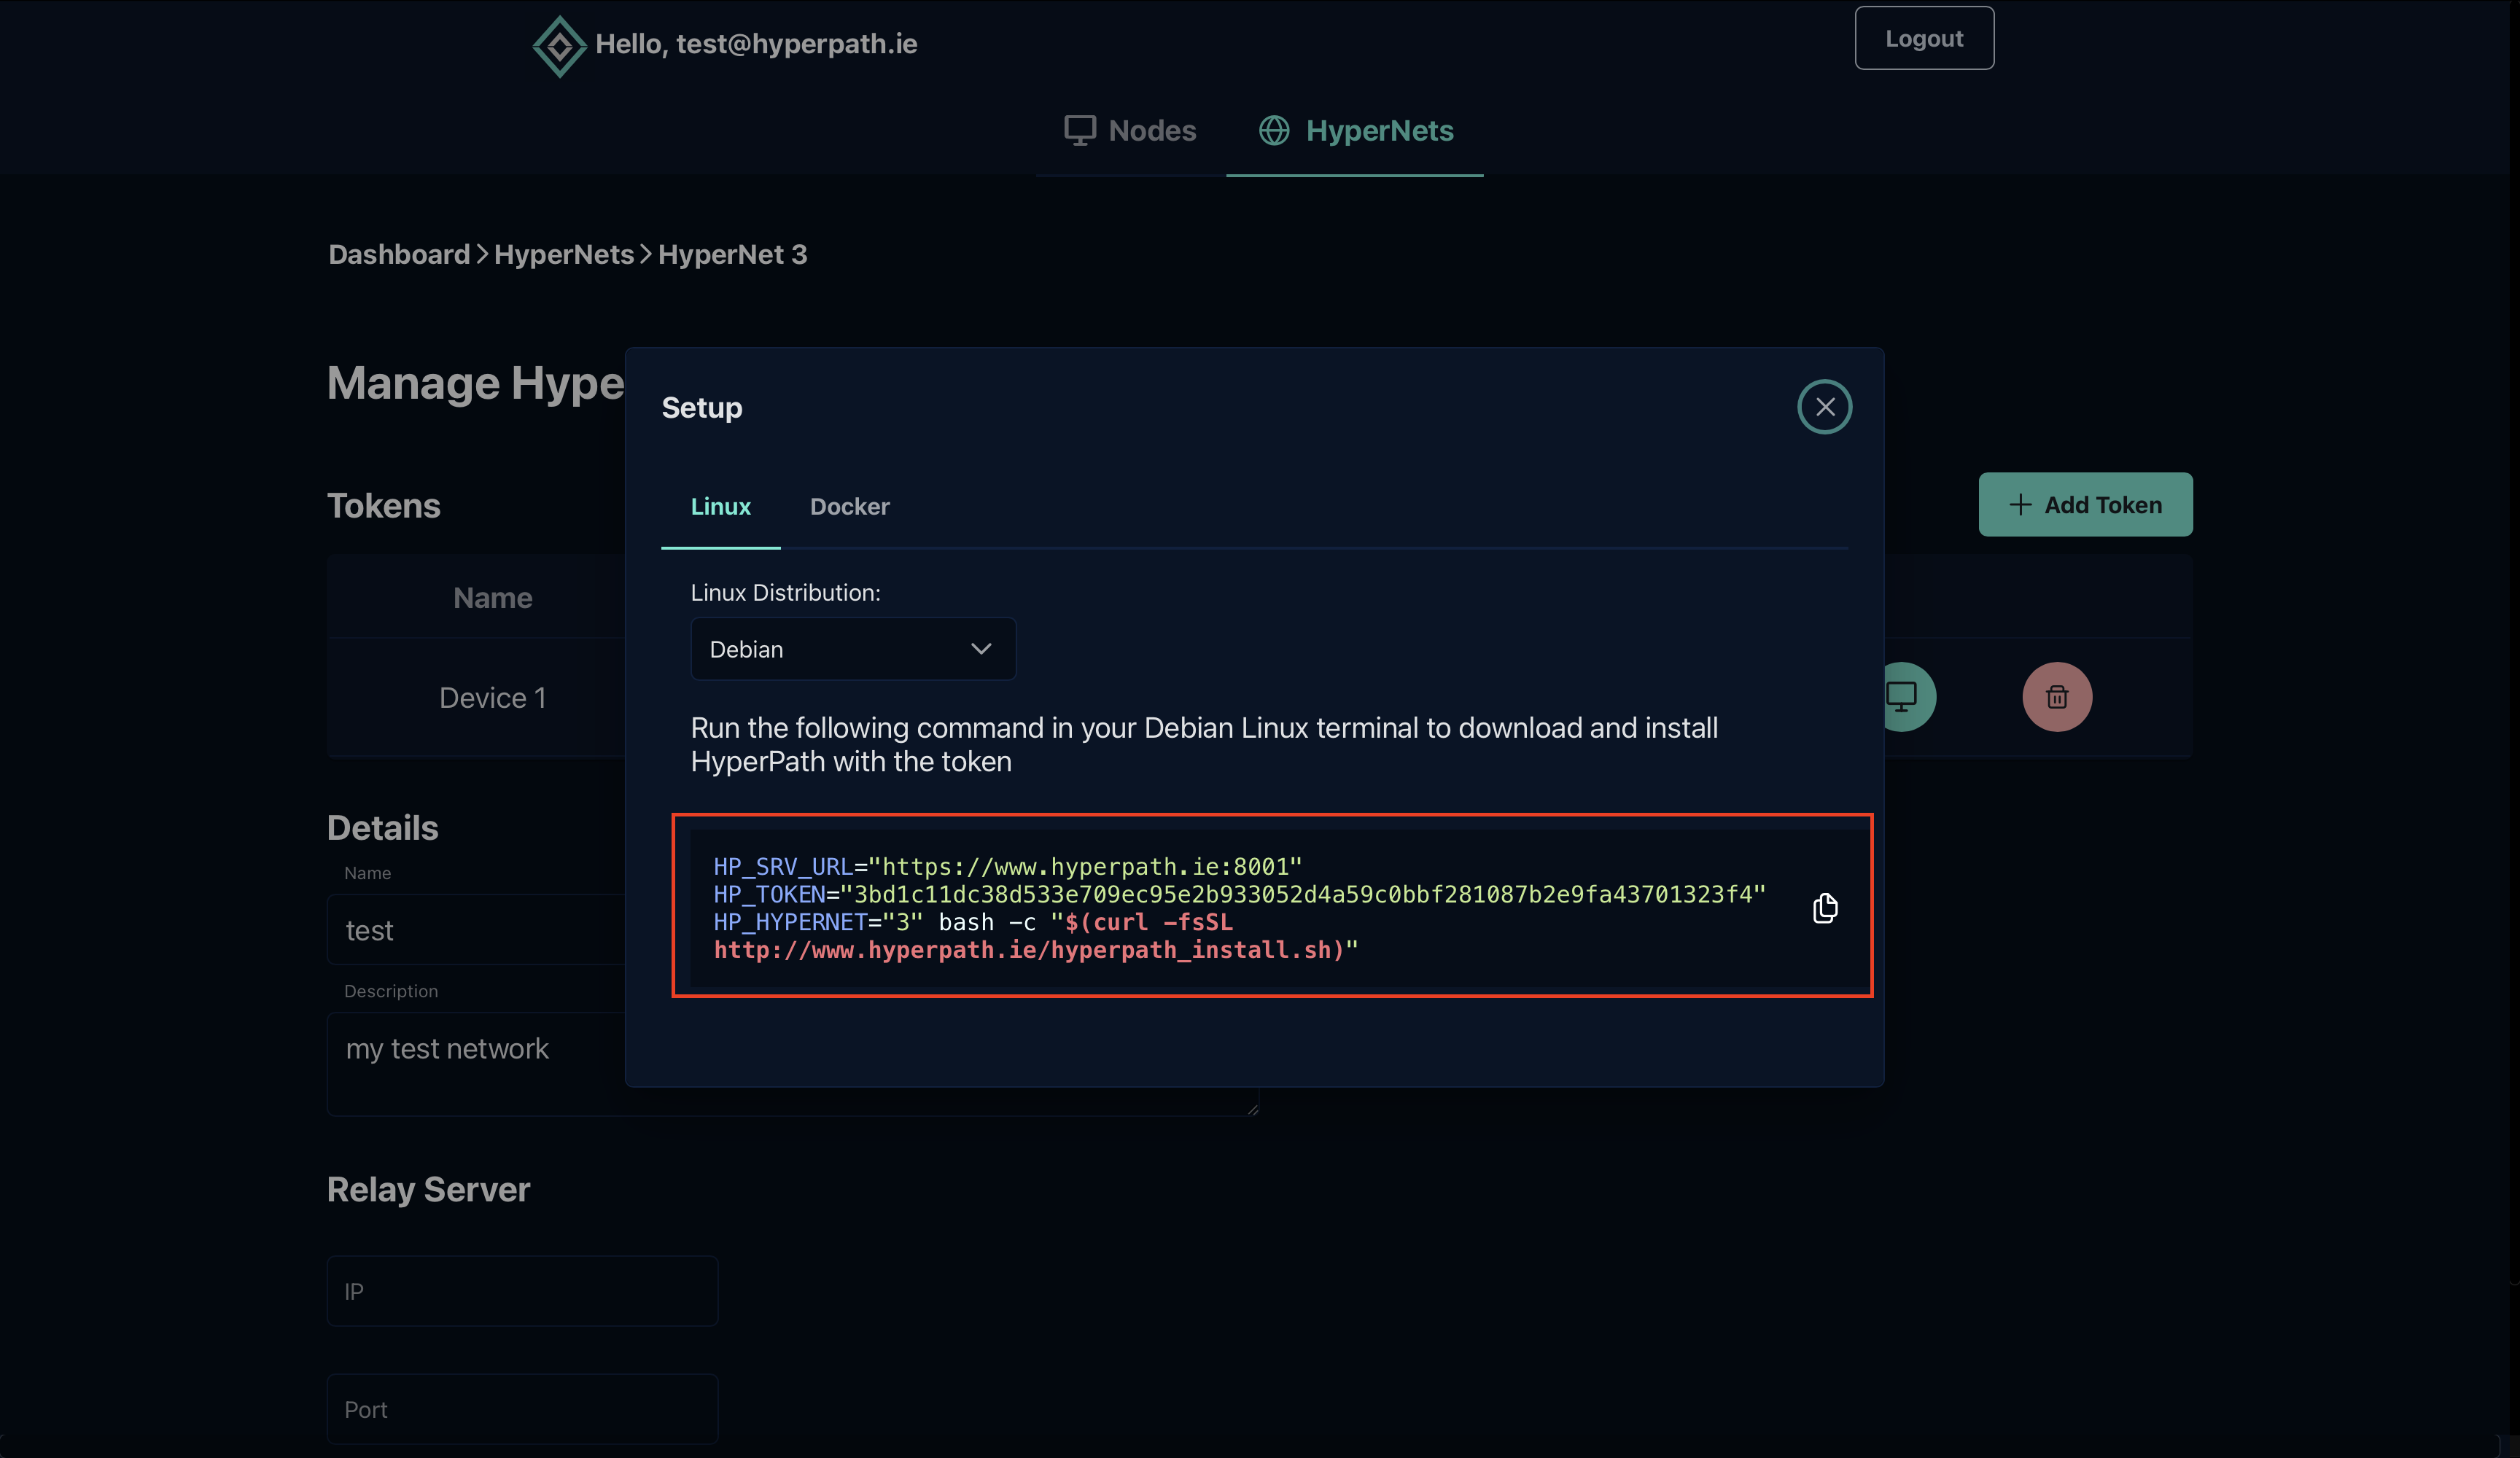
Step 4: Copy Installation Command
A popup will appear containing a unique installation command for your device. This command includes your specific token:
Step 5: Run Installation Command
- Open a terminal on your Debian-based system
- Paste and execute the installation command:
curl -s https://admin.hyperpath.ie/token/install/YOUR-TOKEN-STRING | sudo bash
If successful, you'll see output similar to:
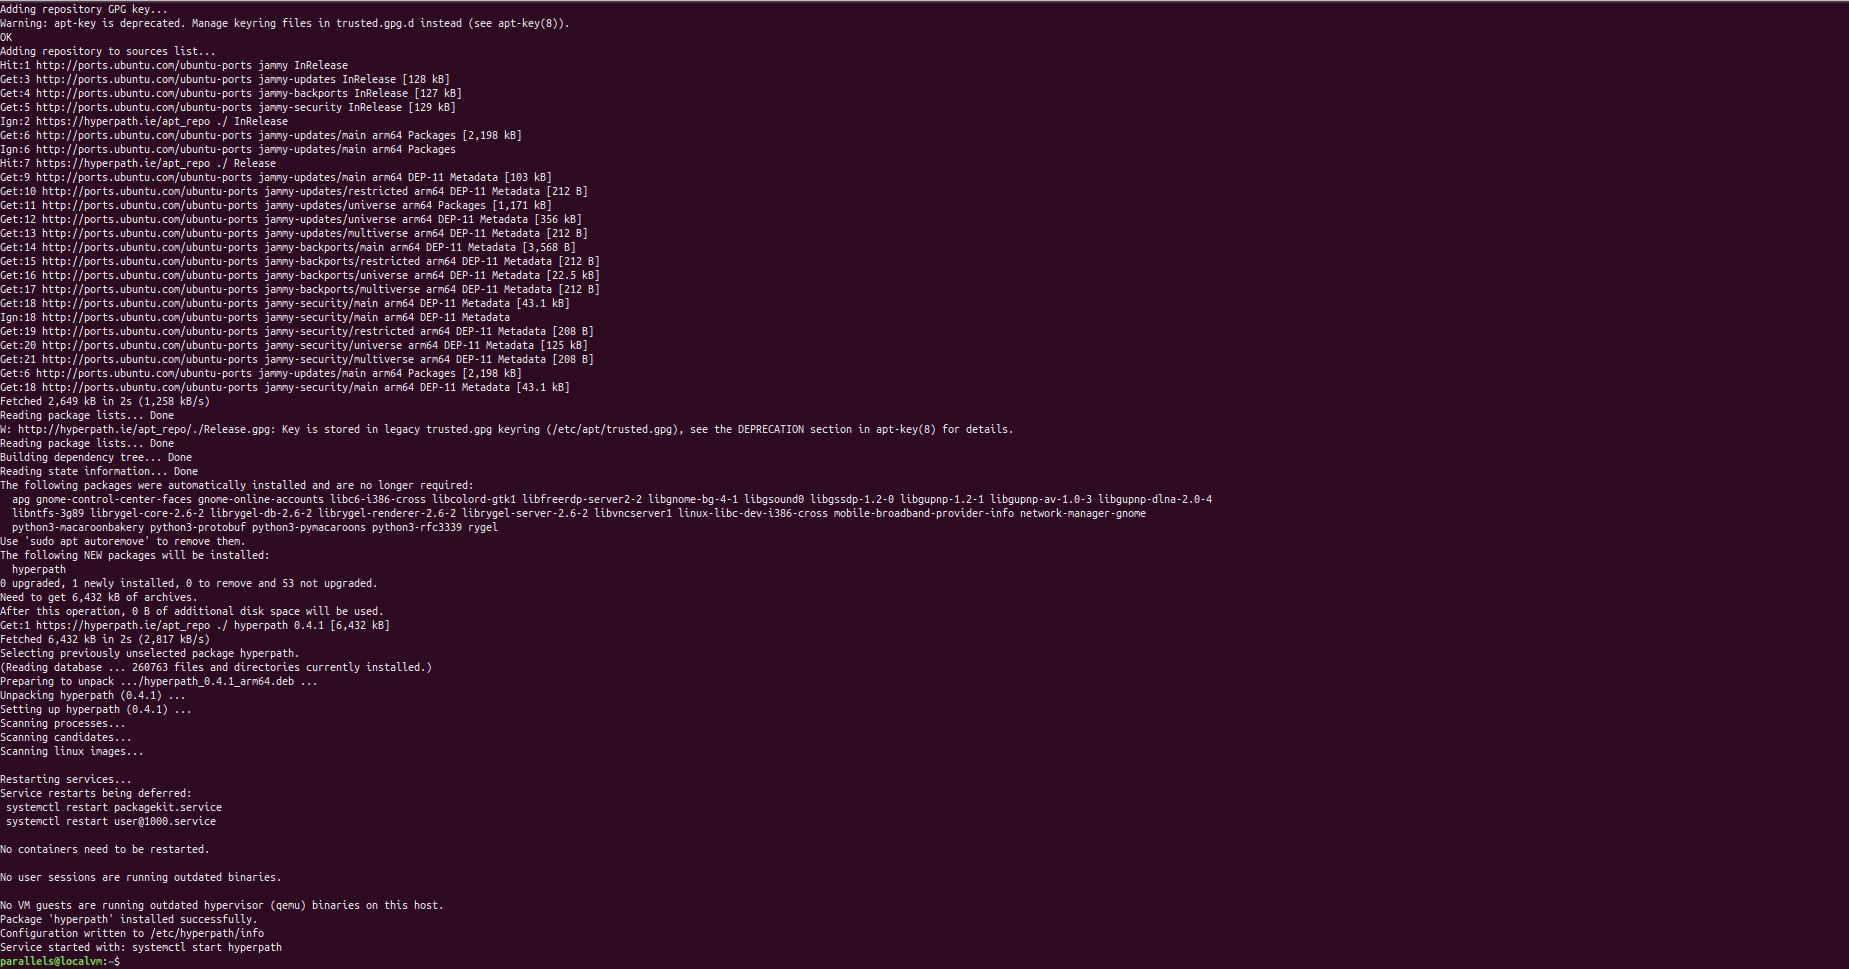
The installation script:
- Adds the HyperPath repository to your package sources
- Installs the HyperPath package and dependencies
- Configures the service with your token
- Starts the HyperPath service
Step 6: Verify Installation
After installation completes, verify that HyperPath is running correctly:
- Check HyperPath status:
hyperpath status
You should see output similar to:

- Verify the SystemD service status:
sudo systemctl status hyperpath
A properly functioning installation will show:

Step 7: Managing the HyperPath Service
You can control the HyperPath service using standard SystemD commands:
Stop the service:
sudo systemctl stop hyperpath
Start the service:
sudo systemctl start hyperpath
Restart the service:
sudo systemctl restart hyperpath
Enable automatic startup on boot:
sudo systemctl enable hyperpath
Disable automatic startup on boot:
sudo systemctl disable hyperpath
Step 8: Updating HyperPath
HyperPath can be updated using standard APT package management:
sudo apt-get update
sudo apt-get install hyperpath
Troubleshooting
Common Issues and Solutions
Installation Fails
If the installation command fails:
- Ensure you have a working internet connection
- Verify that you have sudo privileges
- Check if the HyperPath repository is accessible:
curl -s https://admin.hyperpath.ie/ping
HyperPath Service Won't Start
If the service fails to start:
- Check the logs for errors:
sudo journalctl -u hyperpath -n 50
- Verify that your token is valid and not expired in the admin console
- Ensure no firewall rules are blocking HyperPath's network connections
Network Interface Not Created
If the hp_tun interface doesn't appear:
- Check HyperPath logs:
hyperpath logs
- Ensure the kernel module for TUN/TAP interfaces is loaded:
lsmod | grep tun
- If missing, load the module:
sudo modprobe tun
Advanced Diagnostics
For deeper troubleshooting:
- Enable verbose logging:
sudo sed -i 's/HYPERPATH_OPTS=""/HYPERPATH_OPTS="-v"/' /etc/default/hyperpath
sudo systemctl restart hyperpath
- Check detailed logs:
hyperpath logs -f
Next Steps
After successful installation, you can:
- Connect to other HyperPath nodes
- Configure link bonding for improved performance
- Set up internet connectivity through your HyperNet
- Connect non-HyperPath devices to your network
Uninstalling HyperPath
If needed, you can completely remove HyperPath:
sudo apt-get remove --purge hyperpath
sudo apt-get autoremove
This will remove the package and all related configuration files.